操作系统原理上机试验 2
注意: 涉及到编译内核的部分,由于之前做过两次实验,笔者写得比较简略,具体可参考前两篇内容
操作系统课后实践作业 1
操作系统原理上机试验 1

一、创建线程循环输出数据
创建代码文件
c#include <stdio.h> #include <pthread.h> #include <unistd.h> // 线程 A 的函数 void* threadA(void* arg) { for (int i = 1; i <= 1000; i++) { printf("A:%04d\n", i); fflush(stdout); usleep(200000); // 暂停 0.2 秒 } return NULL; } // 线程 B 的函数 void* threadB(void* arg) { for (int i = 1000; i >= 1; i--) { printf("B:%04d\n", i); fflush(stdout); usleep(200000); // 暂停 0.2 秒 } return NULL; } int main() { pthread_t thread_a, thread_b; // 创建线程 A if (pthread_create(&thread_a, NULL, threadA, NULL) != 0) { perror("pthread_create A"); return 1; } // 创建线程 B if (pthread_create(&thread_b, NULL, threadB, NULL) != 0) { perror("pthread_create B"); return 1; } // 等待线程 A 结束 if (pthread_join(thread_a, NULL) != 0) { perror("pthread_join A"); return 1; } // 等待线程 B 结束 if (pthread_join(thread_b, NULL) != 0) { perror("pthread_join B"); return 1; } return 0; }运行代码观察输出
二、fork函数
1. 父进程不用wait函数
写入代码
c#include <stdio.h> #include <unistd.h> #include <sys/types.h> int main() { pid_t pid = fork(); if (pid < 0) { perror("fork"); return 1; } else if (pid == 0) { // 子进程 printf("子进程: 进程 ID = %d, 父进程 ID = %d\n", getpid(), getppid()); while (1) { // 死循环 sleep(1); } } else { // 父进程 printf("父进程: 进程 ID = %d, 子进程 ID = %d\n", getpid(), pid); } return 0; }运行观察结果


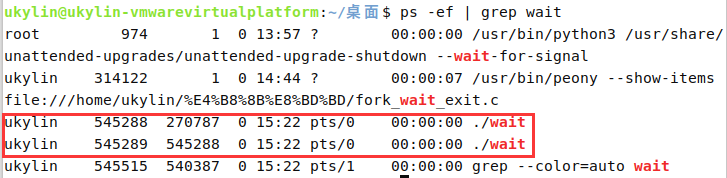
解释
父进程刚创建子进程时 :在
printf输出中,父进程会打印自己的进程 ID 以及子进程的进程 ID,子进程会打印自己的进程 ID 和父进程的进程 ID。此时使用ps -ef命令查看进程列表,这些 ID 是一致的。因为在这个时刻,子进程的父进程就是创建它的父进程,getppid()函数获取的就是创建它的父进程的 ID。父进程结束后 :父进程结束后,子进程会变成孤儿进程,此时使用
ps -ef命令查看子进程的父进程 ID 会发现它变为了 1(init进程的 ID)。而子进程之前通过getppid()打印的父进程 ID 是创建它的父进程的 ID,这就产生了不一致。原因是当父进程先于子进程结束时,子进程会被init进程收养,init进程会成为子进程新的父进程。
2. 父进程使用wait函数
写入代码
c#include <stdio.h> #include <unistd.h> #include <sys/types.h> #include <sys/wait.h> int main() { pid_t pid = fork(); if (pid < 0) { perror("fork"); return 1; } else if (pid == 0) { // 子进程 printf("子进程: 进程 ID = %d, 父进程 ID = %d\n", getpid(), getppid()); sleep(5); exit(123); } else { // 父进程 printf("父进程: 进程 ID = %d, 子进程 ID = %d\n", getpid(), pid); int status; wait(&status); if (WIFEXITED(status)) { printf("父进程: 子进程返回的参数是 %d\n", WEXITSTATUS(status)); } } return 0; }运行观察结果

下一步的命令要在新的终端中输入,并且要在子进程休眠的5秒内运行
解释
子进程运行期间 :在子进程休眠的 5 秒内,使用
ps -ef命令查看进程列表,子进程的进程 ID 和父进程 ID 与printf输出的是一致的。因为在子进程结束之前,它的父进程一直是创建它的父进程,getppid()函数获取的就是正确的父进程 ID。子进程结束后 :子进程结束后,它会从进程列表中消失,所以此时无法再通过
ps -ef命令查看子进程的信息。而父进程会通过wait函数获取子进程的退出状态并打印子进程返回的参数。整个过程中,只要子进程存在,其进程 ID 和父进程 ID 的信息在printf输出和ps -ef命令的输出中是一致的。
三、生产者-消费者
编写代码
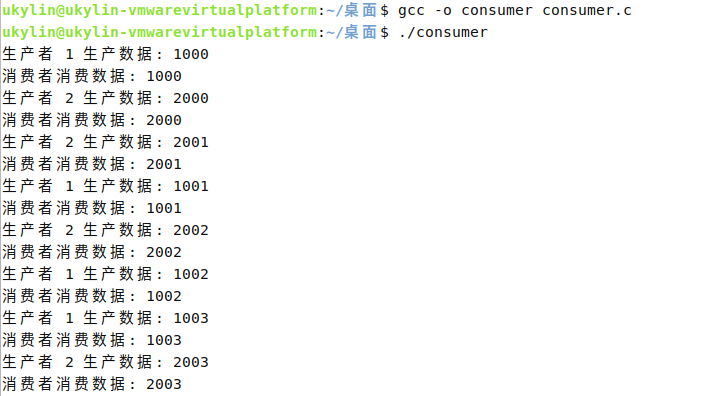
c#include <stdio.h> #include <stdlib.h> #include <pthread.h> #include <semaphore.h> #include <unistd.h> #include <time.h> #define BUFFER_SIZE 10 // 缓冲区 int buffer[BUFFER_SIZE]; // 缓冲区索引 int in = 0; int out = 0; // 互斥锁 pthread_mutex_t mutex; // 信号量 sem_t empty; sem_t full; // 生产者 1 线程函数 void* producer1(void* arg) { int data = 1000; while (data <= 1999) { // 随机休眠 100ms - 1s int sleep_time = (rand() % 900 + 100) * 1000; usleep(sleep_time); sem_wait(&empty); pthread_mutex_lock(&mutex); buffer[in] = data; printf("生产者 1 生产数据: %d\n", data); in = (in + 1) % BUFFER_SIZE; pthread_mutex_unlock(&mutex); sem_post(&full); data++; } return NULL; } // 生产者 2 线程函数 void* producer2(void* arg) { int data = 2000; while (data <= 2999) { // 随机休眠 100ms - 1s int sleep_time = (rand() % 900 + 100) * 1000; usleep(sleep_time); sem_wait(&empty); pthread_mutex_lock(&mutex); buffer[in] = data; printf("生产者 2 生产数据: %d\n", data); in = (in + 1) % BUFFER_SIZE; pthread_mutex_unlock(&mutex); sem_post(&full); data++; } return NULL; } // 消费者线程函数 void* consumer(void* arg) { while (1) { // 随机休眠 100ms - 1s int sleep_time = (rand() % 900 + 100) * 1000; usleep(sleep_time); sem_wait(&full); pthread_mutex_lock(&mutex); int data = buffer[out]; printf("消费者消费数据: %d\n", data); out = (out + 1) % BUFFER_SIZE; pthread_mutex_unlock(&mutex); sem_post(&empty); } return NULL; } int main() { srand(time(NULL)); // 初始化互斥锁和信号量 pthread_mutex_init(&mutex, NULL); sem_init(&empty, 0, BUFFER_SIZE); sem_init(&full, 0, 0); // 创建线程 pthread_t producer_thread1, producer_thread2; pthread_t consumer_thread1, consumer_thread2, consumer_thread3; pthread_create(&producer_thread1, NULL, producer1, NULL); pthread_create(&producer_thread2, NULL, producer2, NULL); pthread_create(&consumer_thread1, NULL, consumer, NULL); pthread_create(&consumer_thread2, NULL, consumer, NULL); pthread_create(&consumer_thread3, NULL, consumer, NULL); // 等待线程结束 pthread_join(producer_thread1, NULL); pthread_join(producer_thread2, NULL); // 由于消费者线程是无限循环,这里可以手动终止程序 // 销毁互斥锁和信号量 pthread_mutex_destroy(&mutex); sem_destroy(&empty); sem_destroy(&full); return 0; }编译运行

四、哲学家就餐
1. 可能死锁方案
写入代码
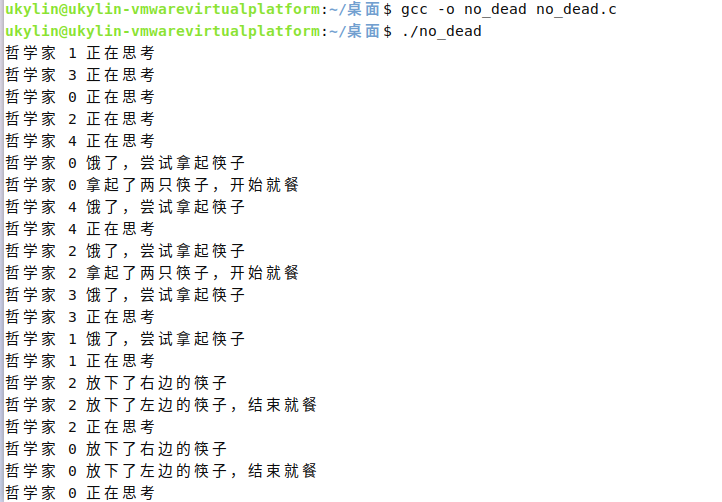
c#include <stdio.h> #include <pthread.h> #include <unistd.h> #include <stdlib.h> #include <time.h> #define N 5 pthread_mutex_t chopsticks[N]; // 随机睡眠 100ms - 500ms void random_sleep() { int ms = rand() % 401 + 100; usleep(ms * 1000); } // 哲学家线程函数 void* philosopher(void* num) { int id = *(int*)num; int left = id; int right = (id + 1) % N; while (1) { printf("哲学家 %d 正在思考\n", id); random_sleep(); printf("哲学家 %d 饿了,尝试拿起筷子\n", id); pthread_mutex_lock(&chopsticks[left]); printf("哲学家 %d 拿起了左边的筷子\n", id); pthread_mutex_lock(&chopsticks[right]); printf("哲学家 %d 拿起了右边的筷子,开始就餐\n", id); random_sleep(); pthread_mutex_unlock(&chopsticks[right]); printf("哲学家 %d 放下了右边的筷子\n", id); pthread_mutex_unlock(&chopsticks[left]); printf("哲学家 %d 放下了左边的筷子,结束就餐\n", id); } return NULL; } int main() { srand(time(NULL)); pthread_t threads[N]; int ids[N]; // 初始化互斥锁 for (int i = 0; i < N; i++) { pthread_mutex_init(&chopsticks[i], NULL); } // 创建哲学家线程 for (int i = 0; i < N; i++) { ids[i] = i; pthread_create(&threads[i], NULL, philosopher, &ids[i]); } // 等待线程结束(这里不会结束) for (int i = 0; i < N; i++) { pthread_join(threads[i], NULL); } // 销毁互斥锁 for (int i = 0; i < N; i++) { pthread_mutex_destroy(&chopsticks[i]); } return 0; }运行结果
 想要观察到死锁,可能需要等待很长时间,因此下面修改代码,使得必然发生死锁,观察效果
2. 必然死锁方案
代码
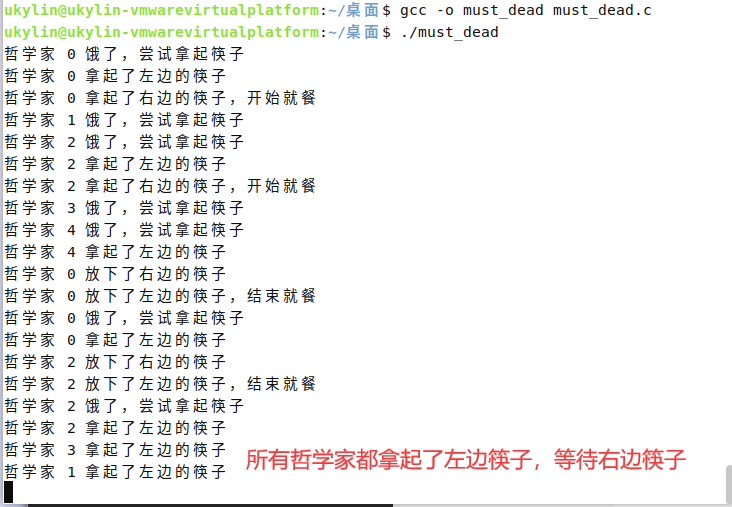
c#include <stdio.h> #include <pthread.h> #include <unistd.h> #include <stdlib.h> #include <time.h> #define N 5 pthread_mutex_t chopsticks[N]; pthread_mutex_t start_mutex; // 哲学家线程函数 void* philosopher(void* num) { int id = *(int*)num; int left = id; int right = (id + 1) % N; // 等待所有线程都准备好 pthread_mutex_lock(&start_mutex); pthread_mutex_unlock(&start_mutex); while (1) { printf("哲学家 %d 饿了,尝试拿起筷子\n", id); pthread_mutex_lock(&chopsticks[left]); printf("哲学家 %d 拿起了左边的筷子\n", id); pthread_mutex_lock(&chopsticks[right]); printf("哲学家 %d 拿起了右边的筷子,开始就餐\n", id); // 模拟就餐时间 sleep(1); pthread_mutex_unlock(&chopsticks[right]); printf("哲学家 %d 放下了右边的筷子\n", id); pthread_mutex_unlock(&chopsticks[left]); printf("哲学家 %d 放下了左边的筷子,结束就餐\n", id); } return NULL; } int main() { pthread_t threads[N]; int ids[N]; // 初始化互斥锁 for (int i = 0; i < N; i++) { pthread_mutex_init(&chopsticks[i], NULL); } pthread_mutex_init(&start_mutex, NULL); pthread_mutex_lock(&start_mutex); // 创建哲学家线程 for (int i = 0; i < N; i++) { ids[i] = i; pthread_create(&threads[i], NULL, philosopher, &ids[i]); } // 释放锁,让所有线程同时开始 pthread_mutex_unlock(&start_mutex); // 等待线程结束(这里不会结束) for (int i = 0; i < N; i++) { pthread_join(threads[i], NULL); } // 销毁互斥锁 for (int i = 0; i < N; i++) { pthread_mutex_destroy(&chopsticks[i]); } pthread_mutex_destroy(&start_mutex); return 0; }实现原理
消除随机性,让所有哲学家同时拿起左边的筷子,然后都等待右边的筷子,从而形成死锁。运行效果
3. 不可能死锁方案
- 写入代码c
#include <stdio.h> #include <pthread.h> #include <unistd.h> #include <stdlib.h> #include <time.h> #define N 5 pthread_mutex_t chopsticks[N]; // 随机睡眠 100ms - 500ms void random_sleep() { int ms = rand() % 401 + 100; usleep(ms * 1000); } // 哲学家线程函数 void* philosopher(void* num) { int id = *(int*)num; int left = id; int right = (id + 1) % N; while (1) { printf("哲学家 %d 正在思考\n", id); random_sleep(); printf("哲学家 %d 饿了,尝试拿起筷子\n", id); if (pthread_mutex_trylock(&chopsticks[left]) == 0) { if (pthread_mutex_trylock(&chopsticks[right]) == 0) { printf("哲学家 %d 拿起了两只筷子,开始就餐\n", id); random_sleep(); pthread_mutex_unlock(&chopsticks[right]); printf("哲学家 %d 放下了右边的筷子\n", id); } else { pthread_mutex_unlock(&chopsticks[left]); continue; } pthread_mutex_unlock(&chopsticks[left]); printf("哲学家 %d 放下了左边的筷子,结束就餐\n", id); } } return NULL; } int main() { srand(time(NULL)); pthread_t threads[N]; int ids[N]; // 初始化互斥锁 for (int i = 0; i < N; i++) { pthread_mutex_init(&chopsticks[i], NULL); } // 创建哲学家线程 for (int i = 0; i < N; i++) { ids[i] = i; pthread_create(&threads[i], NULL, philosopher, &ids[i]); } // 等待线程结束(这里不会结束) for (int i = 0; i < N; i++) { pthread_join(threads[i], NULL); } // 销毁互斥锁 for (int i = 0; i < N; i++) { pthread_mutex_destroy(&chopsticks[i]); } return 0; } - 运行结果
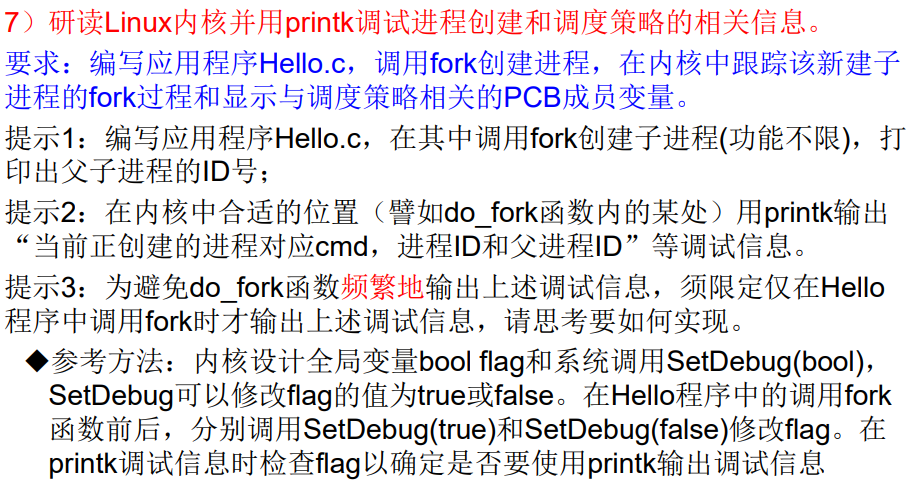
五、printk调试内核
1、更新系统调用表
打开syscall_64.tbl
sudo vim arch/x86/entry/syscalls/syscall_64.tbl添加系统调用
根据文件内容,可以将调用接在547号系统调用后面(使用insert)c548 64 SetDebug sys_SetDebug
保存文件
按下ESC再按下:输入wq回车退出(后续不再赘述)
2、更新头文件(函数声明)
打开syscalls.h
sudo vim include/linux/syscalls.h插入声明
casmlinkage long sys_SetDebug(int flag);
保存文件
3、添加系统调用
打开sys.c
sudo vim kernel/sys.c添加函数
cbool flag = false; SYSCALL_DEFINE1(SetDebug, int, value) { flag = (value != 0); return 0; }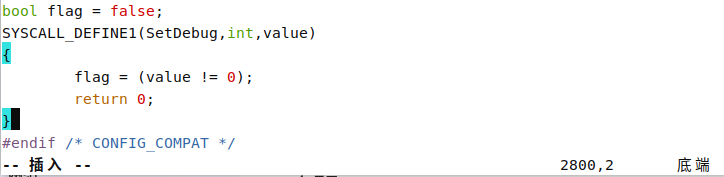
保存文件
4、更新ID声明
- 打开unistd.h
sudo vim include/uapi/asm-generic/unistd.h - 添加声明c
#define __NR_SetDebug 548
SYSCALL(__NR_SetDebug, sys_SetDebug)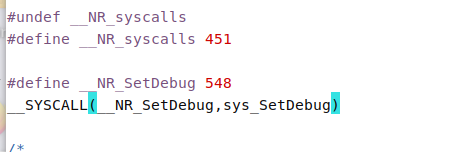
5、修改fork.c文件
打开fork.c
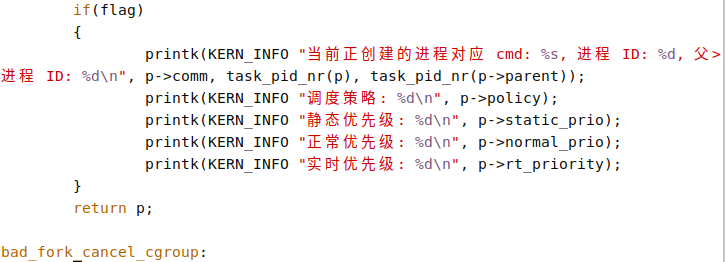
sudo vim kernel/fork.c增加调试信息(
copy_process函数,在return p;之前)cextern bool flag; // 文件开头 // ···中间代码 if (flag) { printk(KERN_INFO "当前正创建的进程对应 cmd: %s, 进程 ID: %d, 父进程 ID: %d\n", p->comm, task_pid_nr(p), task_pid_nr(p->parent)); printk(KERN_INFO "调度策略: %d\n", p->policy); printk(KERN_INFO "静态优先级: %d\n", p->static_prio); printk(KERN_INFO "正常优先级: %d\n", p->normal_prio); printk(KERN_INFO "实时优先级: %d\n", p->rt_priority); }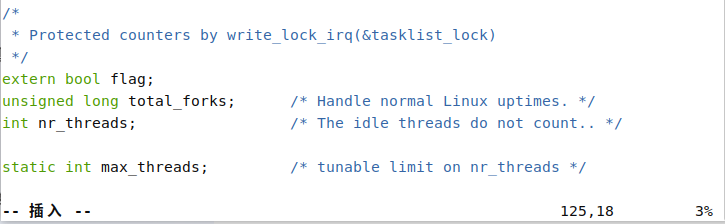
可能出现的错误
如果extern bool flag;直接放在if(flag)之前,可能会出现以下警告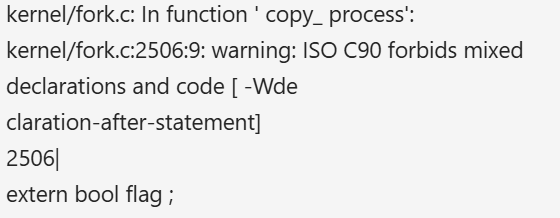
原因:
在代码里存在混合声明和代码的情况,而 ISO C90 标准不允许这么做。在 ISO C90 标准中,变量声明必须放在代码块的开头部分,不能穿插在可执行代码之间。
6、重新编译并安装内核
编译
sudo make -j16(基于8核处理器)安装模块
sudo make modules_install检查旧内核文件
ls /boot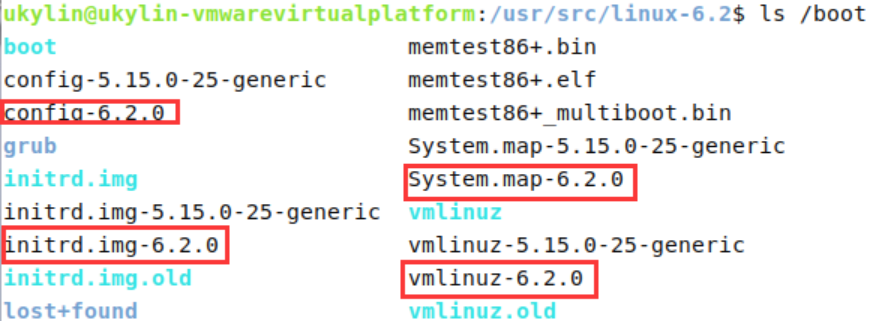
删除旧内核文件
sudo rm /boot/config-6.2.0 /boot/initrd.img-6.2.0 /boot/System.map-6.2.0 /boot/vmlinuz-6.2.0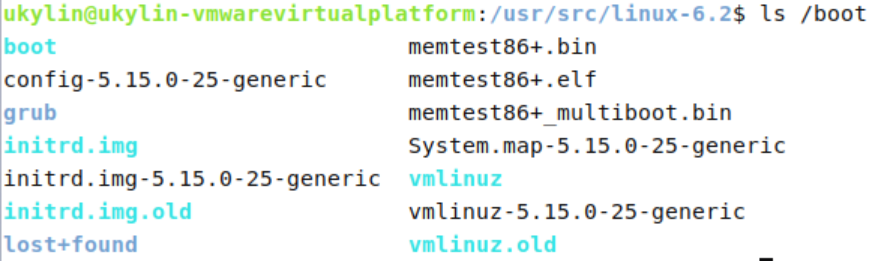
安装内核
sudo make install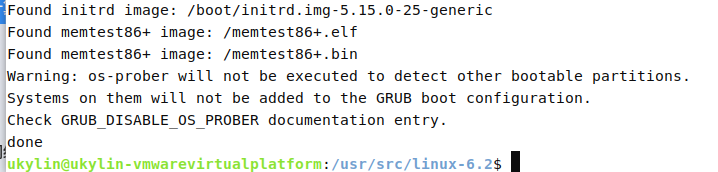
更新引导程序
sudo update-grub重启
sudo reboot now
7、编写用户空间程序hello.c
代码
c#include <stdio.h> #include <unistd.h> #include <sys/syscall.h> #define __NR_SetDebug 548 // 自定义系统调用号,需要和内核中定义的一致 // 定义 SetDebug 系统调用函数 void SetDebug(int flag) { syscall(__NR_SetDebug, flag); } int main() { pid_t pid; // 开启调试信息输出 SetDebug(1); // 创建子进程 pid = fork(); if (pid < 0) { perror("fork"); return 1; } else if (pid == 0) { // 子进程 printf("子进程 ID: %d, 父进程 ID: %d\n", getpid(), getppid()); } else { // 父进程 printf("父进程 ID: %d, 子进程 ID: %d\n", getpid(), pid); } // 关闭调试信息输出 SetDebug(0); return 0; }编译运行
bashgcc -o hello hello.c ./hello
查看调试信息
sudo dmesg -c